Implementing custom surveys

Last updated:

|Edit this page

At its most basic level, a survey is a collection of response events. If you wanted to, you could capture events from anywhere, like in this example of a hardcoded Next.js feedback survey:

Web
'use client'
import { usePostHog } from 'posthog-js/react';
export default function Feedback() {
const posthog = usePostHog();
const handleFeedbackSubmit = (e) => {
e.preventDefault();
const feedback = e.target.elements.feedback.value;
posthog.capture("survey sent", {
$survey_id: '018ed910-3b24-0000-e3fd-d51c59aa74b2',
$survey_response: feedback
})
}
return (
<div>
<h1>Give us feedback</h1>
<form onSubmit={handleFeedbackSubmit}>
<textarea
id="feedbackInput"
name="feedback"
placeholder="Enter your feedback here..."
required
></textarea>
<button type="submit">Submit Feedback</button>
</form>
</div>
);
}

The benefit of using PostHog beyond this is that it handles:

  1. Survey content. Customize question type, text, and more. Change it at runtime without needing to redeploy your app.

  2. Display conditions. This means not showing the same survey multiple times, the wrong survey, or a survey that has collected enough responses. Leverage property filters, cohorts, feature flags, and more.

If you create a popover survey, updating and display conditions are handled automatically. When you create one in API mode, you need to add logic to fetch and display surveys yourself with the help of the JavaScript Web SDK or snippet.

Rendering surveys programmatically

Although we recommend using popover surveys and display conditions, if you want to show surveys programmatically without setting up all the extra logic needed for API surveys, you can render surveys programmatically with the renderSurvey method. This takes a survey ID and an HTML selector to render an unstyled survey.

An example implementation in React looks like this:

JavaScript
import './App.css';
import React from 'react';
import { usePostHog } from 'posthog-js/react';
function App() {
const posthog = usePostHog();
const coolSurveyID = "01942e4c-d028-0000-6ab5-afb4ed961263"
const handleRenderSurvey = () => {
posthog.renderSurvey(coolSurveyID, '#survey-container');
};
return (
<div className="App">
<h1>Survey Tutorial with PostHog</h1>
<div className="survey-controls">
<button onClick={handleRenderSurvey}>
Render Survey
</button>
</div>
<div id="survey-container">
<p>Survey will render here</p>
</div>
</div>
);
}
export default App;

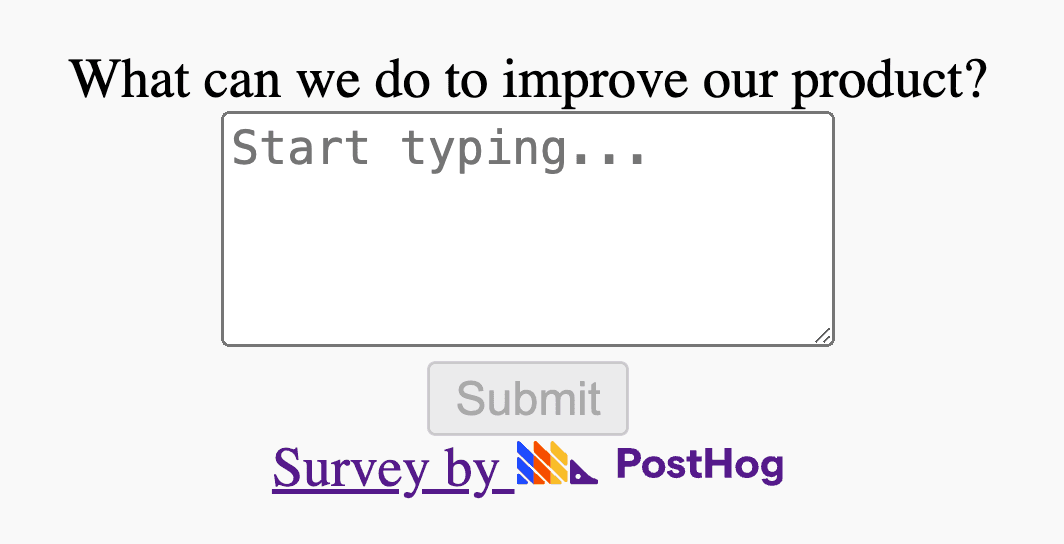
This renders an unstyled survey in the #survey-container element that looks like this:
Survey templates

You can then style the survey by targeting the classes like survey-box, survey-question, textarea, buttons, footer-branding, and thank-you-message.

Fetching surveys manually

For more control over your surveys, you can use API surveys. When implementing an API survey, there are two options for fetching surveys from PostHog:

  1. To get all surveys, call getSurveys(callback, forceReload). This means you still need to handle display conditions yourself.

  2. To get surveys enabled for the current user, call getActiveMatchingSurveys(callback, forceReload). This always returns an active survey if the user meets the display conditions, even if they have already seen, dismissed, or responded to the survey.

Surveys are requested on first load and then cached by default by the JavaScript SDK. If you want to force an API call to get an updated list of surveys, pass true to the forceReload parameter. You only need to do this if you want changed surveys to appear mid-session for users.

Both methods return a callback with an array of surveys in this format:

JSON
// Example surveys response:
[{
"id": "your_survey_id",
"name": "Your survey name",
"description": "Metadata describing your survey",
"type": "api", // "api" or "popover"
"linked_flag_key": null, // Linked feature flag key, if any.
"targeting_flag_key": "your_survey_targeting_flag_key",
"questions": [
{
"type": "single_choice",
"choices": [
"Yes",
"No"
],
"question": "Are you enjoying PostHog?"
}
],
"conditions": null,
"appearance": {},
"start_date": "2023-09-19T13:10:49.505000Z",
"end_date": null
}]

As an example, we can use getActiveMatchingSurveys() to make our Next.js feedback survey more dynamic:

Web
'use client'
import { usePostHog } from 'posthog-js/react';
import { useEffect, useState } from 'react';
export default function Feedback() {
const [survey, setSurvey] = useState({})
const posthog = usePostHog()
useEffect(() => {
posthog.getActiveMatchingSurveys((surveys) => {
if (surveys.length > 0) {
const survey = surveys[0];
setSurvey(survey)
}
});
}, [posthog]);
const handleFeedbackSubmit = (e) => {
e.preventDefault();
const feedback = e.target.elements.feedback.value;
posthog.capture("survey sent", {
$survey_id: survey.id,
$survey_response: feedback
})
}
return (
<div>
{survey && (
<>
<h1>{survey.questions[0].question}</h1>
<form onSubmit={handleFeedbackSubmit}>
<textarea
id="feedbackInput"
name="feedback"
placeholder={survey.appearance.placeholder}
required
></textarea>
<button type="submit">Submit Feedback</button>
</form>
</>
)}
</div>
);
}

Tip: To keep track of surveys shown, dismissed, or responded to, store values in a cookie or local storage like this:

Web
//... other code
posthog.capture("survey sent", {
$survey_id: survey.id,
$survey_response: feedback
})
localStorage.setItem(`hasInteractedWithSurvey_${survey.id}`, 'true');

Capture survey responses

The main event you must capture to track survey results is survey_sent which we've already shown. It is formatted like this:

Web
posthog.capture("survey sent", {
$survey_id: survey.id, // required
$survey_response: survey_response // required. `survey_response` must be a text value.
})

Survey responses expect text, so you should convert numbers to text e.g. 8 should be converted to "8".

For multiple choice surveys, survey_response must be an array of values with the selected choices e.g., $survey_response: ["response_1", "response_2"].

Capturing multiple responses

If you have a survey with multiple questions, you can capture the responses to each question using the following syntax:

Web
posthog.capture("survey sent", {
$survey_id: survey.id, // required
$survey_response: survey_response,
$survey_response_1: survey_response_1,
$survey_response_2: survey_response_2
})

If you want to make the most of PostHog's automatic survey analysis and results visualizations page, you'll need to capture survey responses in the above formats.

Capture survey lifecycle events

There are two other events you should capture to track the full lifecycle of a survey. They are survey shown and survey dismissed:

Web
// 1. When a user is shown a survey
posthog.capture("survey shown", {
$survey_id: survey.id // required
})
// 2. When a user has dismissed a survey
posthog.capture("survey dismissed", {
$survey_id: survey.id // required
})

Capturing all three events ensures you have a full implementation matching popup surveys and that your analysis is accurate in PostHog.

Questions? Ask Max AI.

It's easier than reading through 555 docs articles.

Community questions

Was this page useful?

Next article

Viewing survey results

Survey results can be viewed in two places: On the survey page, in the "Results" tab. By creating your own insights . 1. On the survey page You can view your results by selecting your survey from the surveys tab . You'll see data on: How many users have seen the survey. How many users have dismissed the survey. Responses. Depending your question type , you may also see charts with your responses. 2. Creating your own insights To create insights from survey results, navigate to the insights…

Read next article